My computer tower was too small.
I had gotten it from a friend a while ago and was quickly running out of room as I upgraded it. Instead of spending $60 on a new case with all the space in the world, I decided to make myself a 3D printed case. Why would I spend so much time and effort on something like this? Good question, I am not sure either. My main goal was to make a modular case that would make future upgrades easy and allow me complete control over the airflow. Also, this is one of the larger assemblies I have made for personal use (200+ parts). At work, most of the design work is iterative or fixed into a larger assembly, so I am quite used to working around other people’s skeletons and parametric constraints, but I haven’t had to make them from scratch. All things considered, I am quite pleased with both the end product and CAD model setup and am glad I decided to take this on.
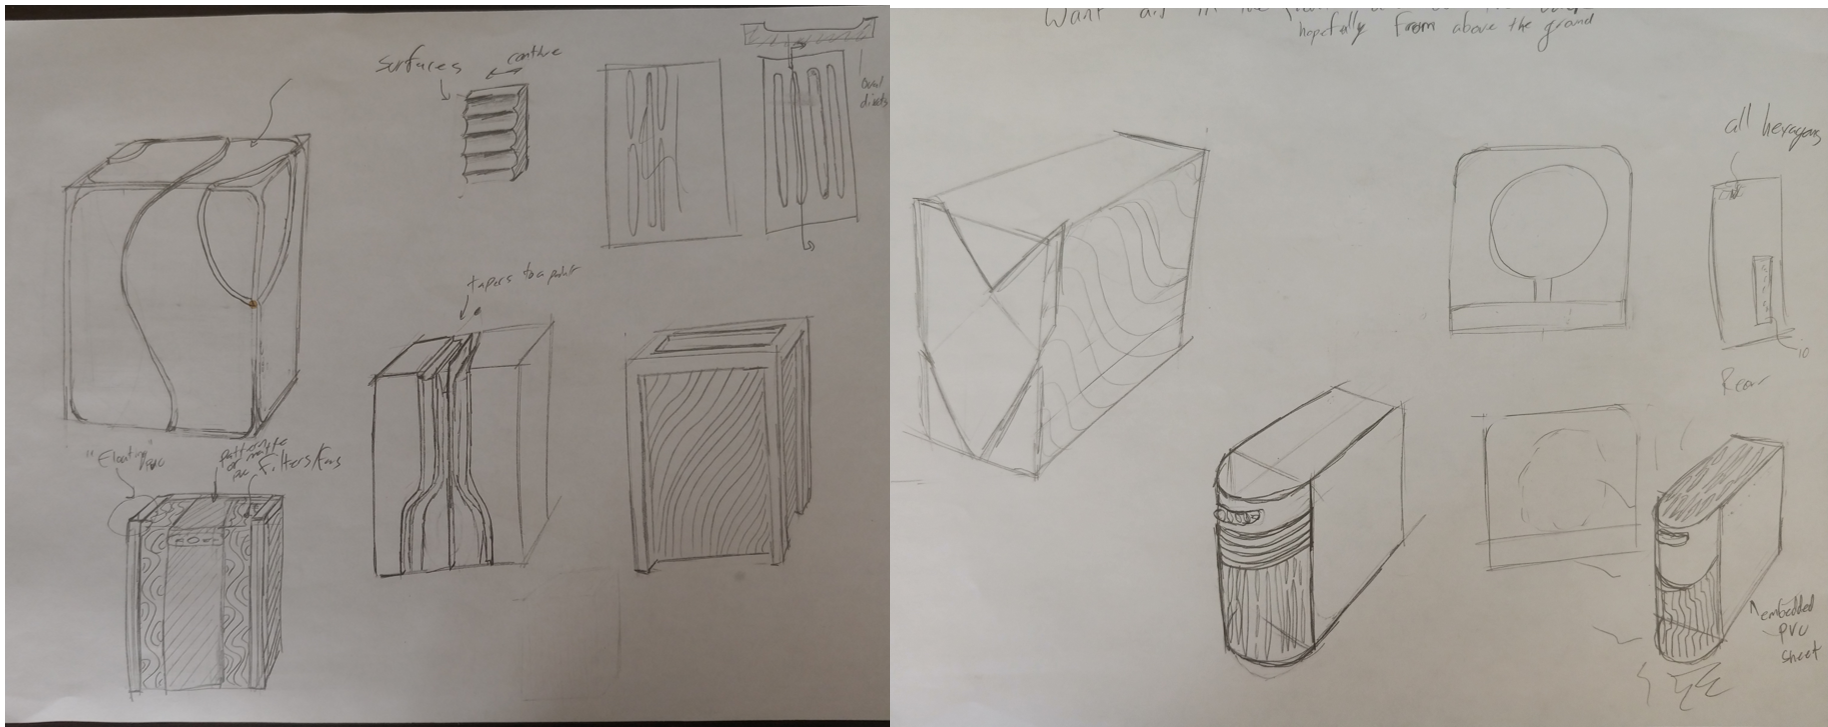
Sketches of my inital concepts. I have taken to sketching to get my ideas out quickly before filling in the details in CAD.
For this design, I wanted to experiment with different designs and surface patterns. While my printer is quite large, it can’t make the clean, perfectly flat surfaces that are standard on sheet-metal cases. Rather than fight it, I wanted to work with my printer’s strengths and pattern the walls of my case in a way that would be impossible with traditional manufacturing. The only problem was finding a pattern and overall shape that didn’t look hideous and was easily printable.
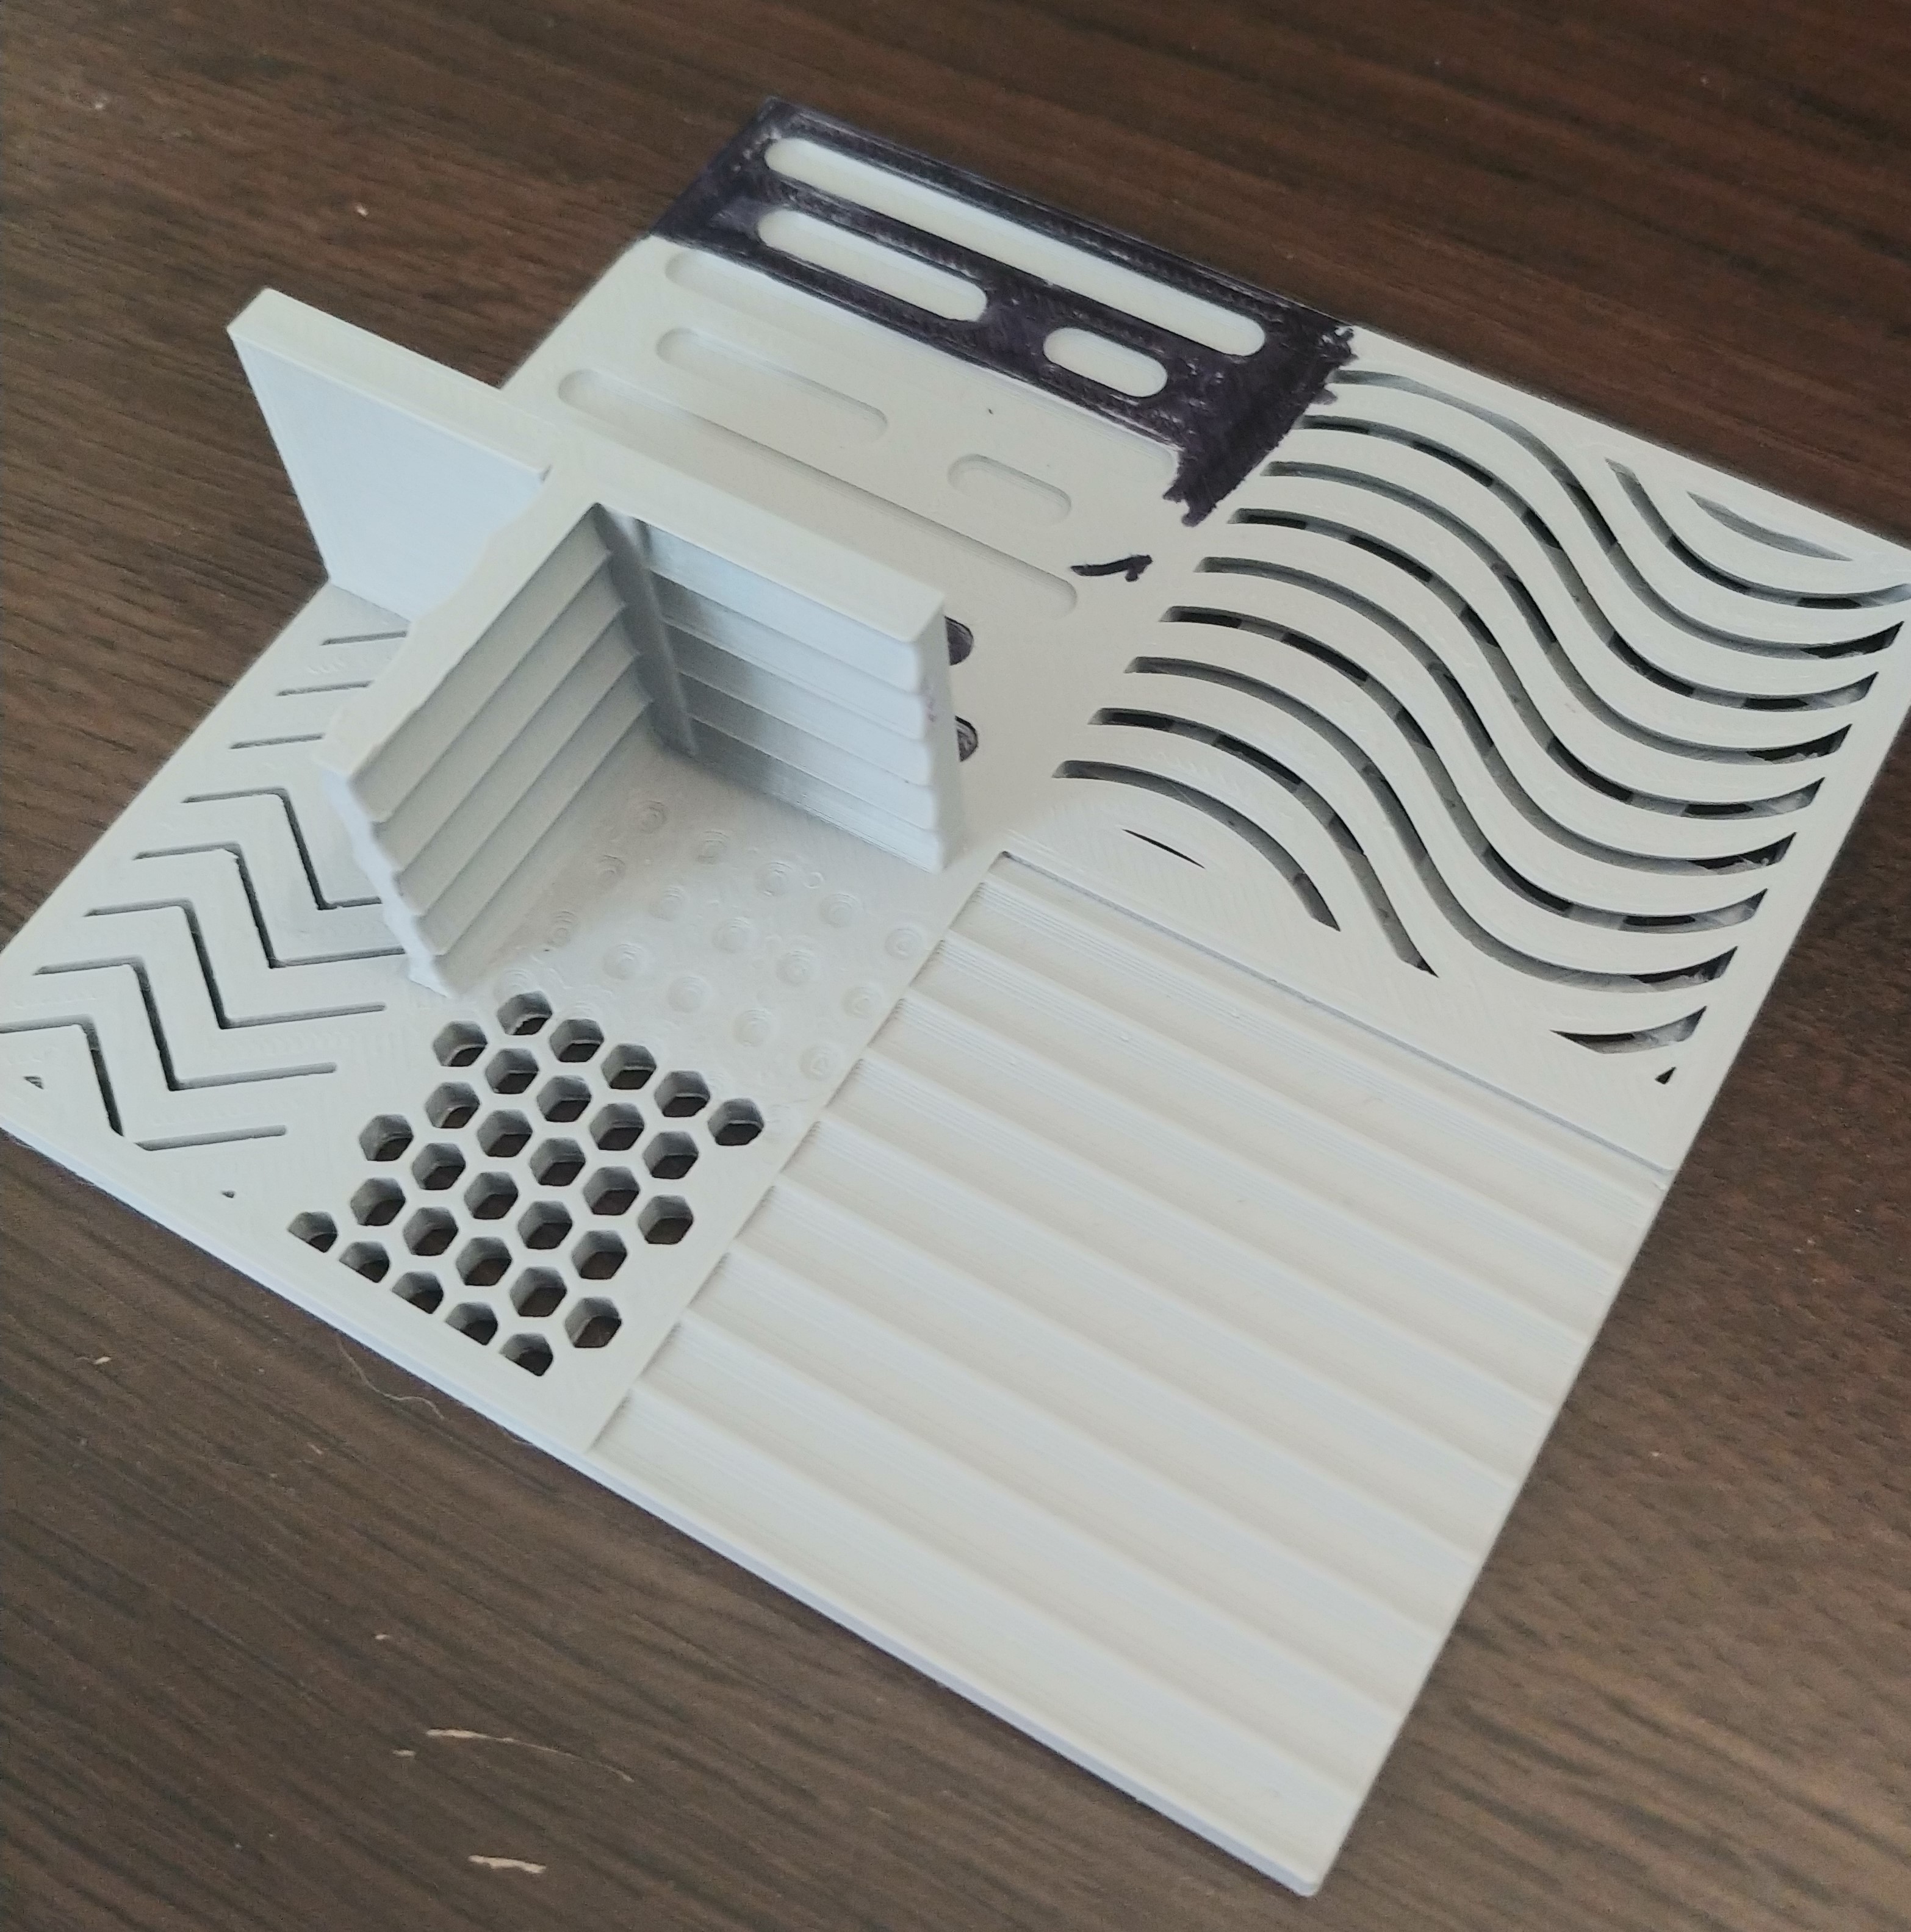
Test print for different patterns on both horizontal and vertical surfaces
I started by making a test print with different patterns printed in different orientations. I found that most of the patterns mask any small inconsistences in printing and makes quality of the part look a lot better. However, they do add a lot of “visual noise” to the overall piece, so they need to be used wisely.
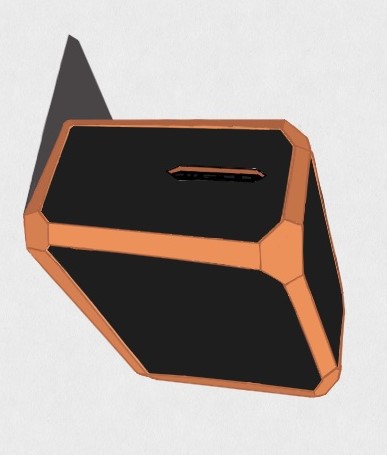
Final sketch to block out the colors and silhouette of the case
After a good amount of sketching, test prints, and filament research, I decided on a black and gold case with a hexagonal theme. They proved to be quite difficult to draw and easy to model, so I left them out of my final sketch and instead focused on the form and colors. I am not a designer or artist, but I have been working on it and I think my sketch turned out pretty well.
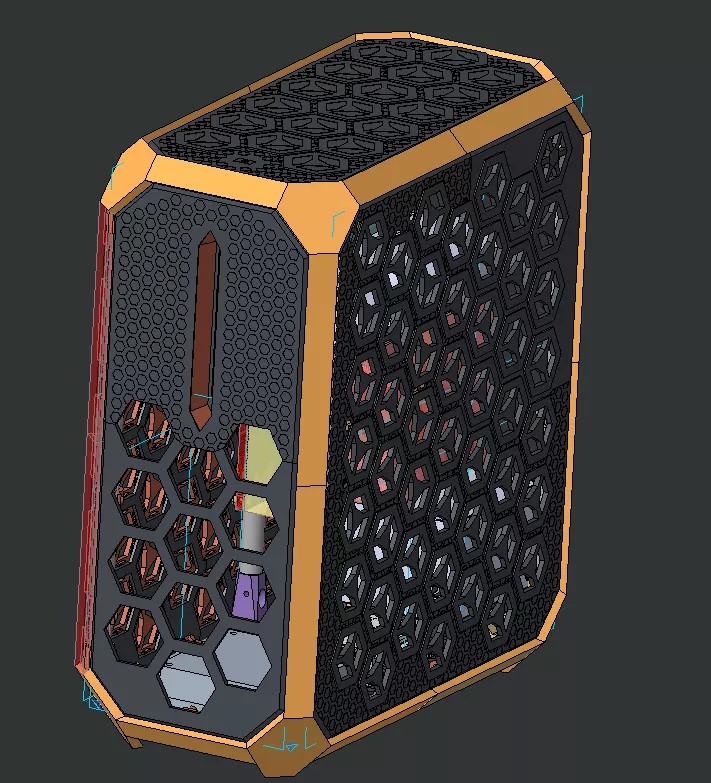
The larger hexagonal holes are filled in by hexagonal plugs that can be used to control airflow, while the smaller hexagons give the surface texture and disguise any imperfections.
In order to pattern the surface of the computer’s walls, I printed them with the outside facing the build plate. Where the plastic prints on my smooth build plate, it produces a shiny surface. However, if there are any small issues with the print, it is very visible on a surface like this. Staying with hexagonal theme, I put tiny hexagonal indents all over the walls. These indents are 0.3mm deep, which is the exact layer height of my printer. This causes small hexagonal holes to be present on the first layer of my print, and then disappear in the second layer. Since the second layer is solid, it prints over the entire area of the part, including the gaps left by the holes in the first layer. The small 0.3mm gap is no problem for the printer to handle, however, since this second later of plastic doesn’t bond with the build plate, it produces a different finish wherever I put the indents. This looks a bit hectic in CAD, but I really like its effect in real life, and it almost completely disguises any imperfections in the print. Also, all of the walls needed to be broken into four parts in order to be printed, and this makes their seams almost indistinguisable.

Compliant cantilever beams that make a decent snap fit.
The hexagonal plugs are fixed to the walls with compliant lever arms. I made them this way because I wanted something that was secure, easy to disassemble, and have an interference fit so that there is no chance of an annoying rattle. Additionally, these hexagons allow me to have a lot of control over the airflow through the PC. The modular customizability of the airflow is reason I trusted 3D printed materials for this job. As someone who left a 3D printed part in my car on a hot day, I am very aware of the glass transition temperature of thermoplastic materials. However, I was confident that with some testing I could tune the airflow to keep everything below the 40-50C limit.
After everthing was designed and printed, assembly was pretty uneventful. The parts are either held together with embedded magnets or threaded inserts, so all of the connections are secure and easy to assemble/disassemble. I did my best to design the case such that small veriations in dimensions wouldn't be noticable or impact performance, and I am proud to say that I only had to reprint two pieces. The first was a filament issue, and the second was because I didn't measure the IO ports well. All in all, I (and my wallet) are super happy that I didn't have to reprint anything big and that everything came together well on the first try.

Assembling the frame.

Making sure all of the electronics fit properly

I used my computer like this for a few days while I waited for the side walls to finish printing.
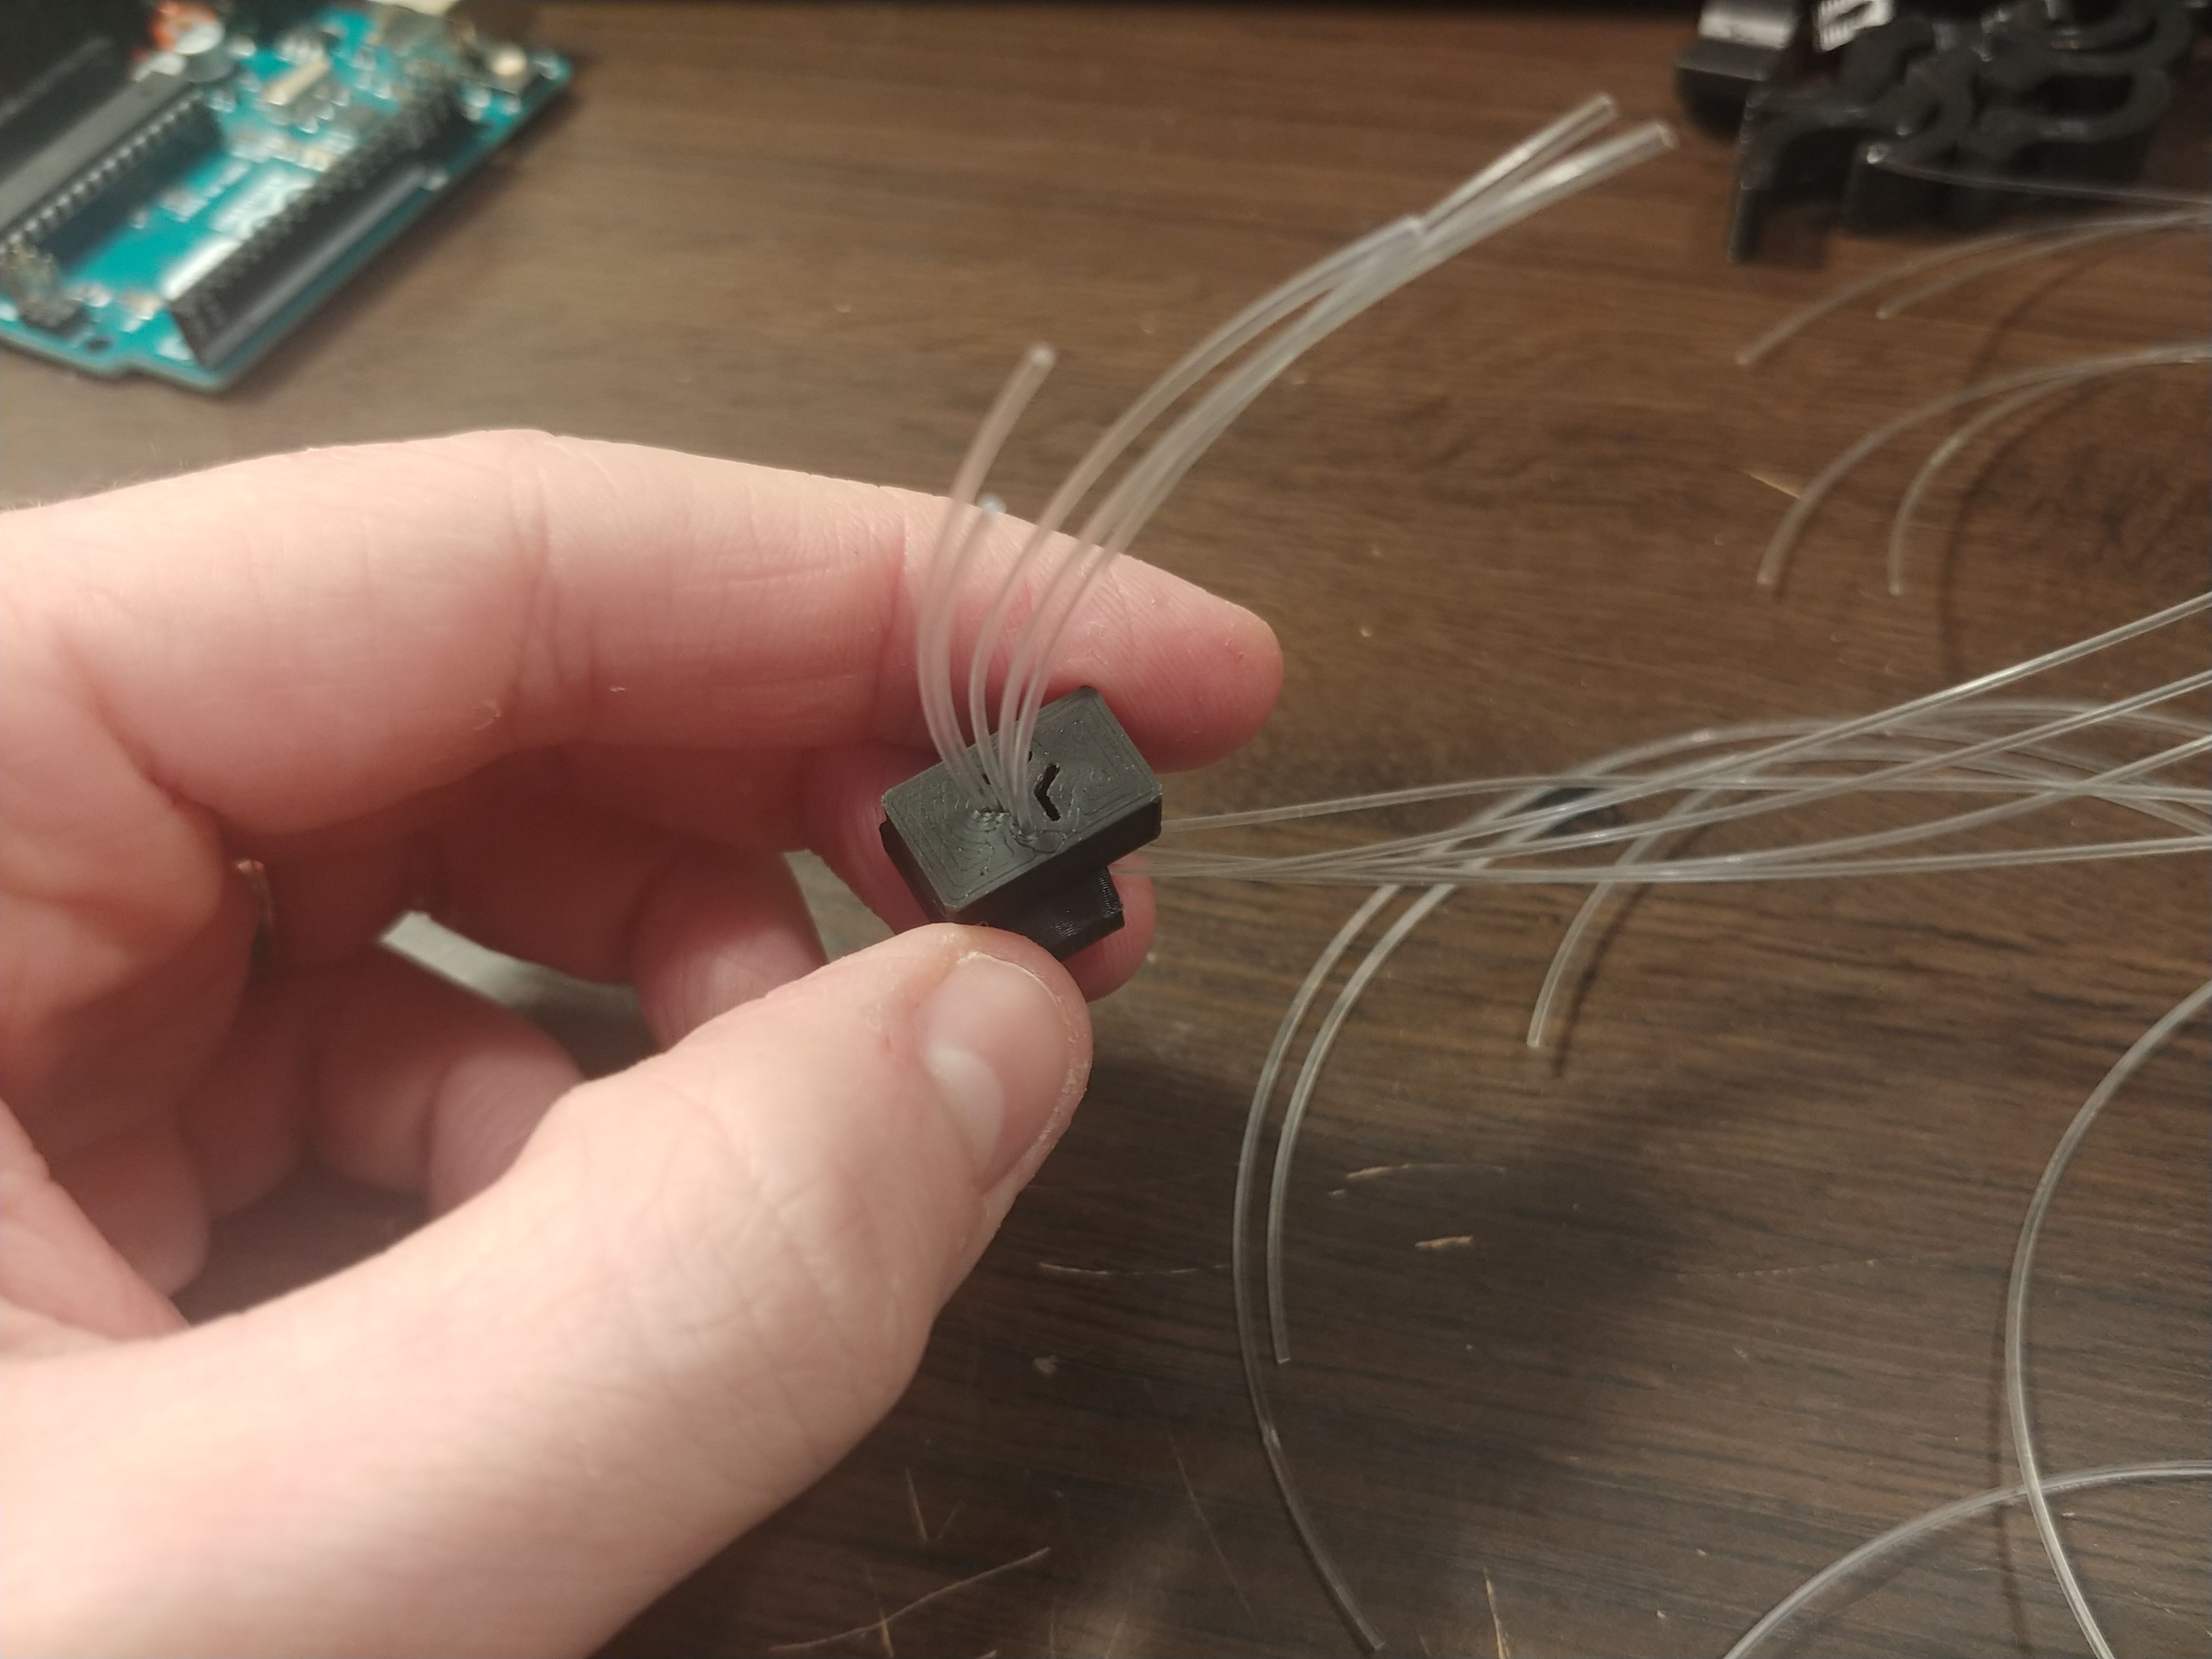
I am proud of the way my power button turned out. It has a satifying click and the embedded fiber optic cables make it light up when the computer turns on. Unfortunately, it proved beyond my phone's abilites to take a good photo of it in action.
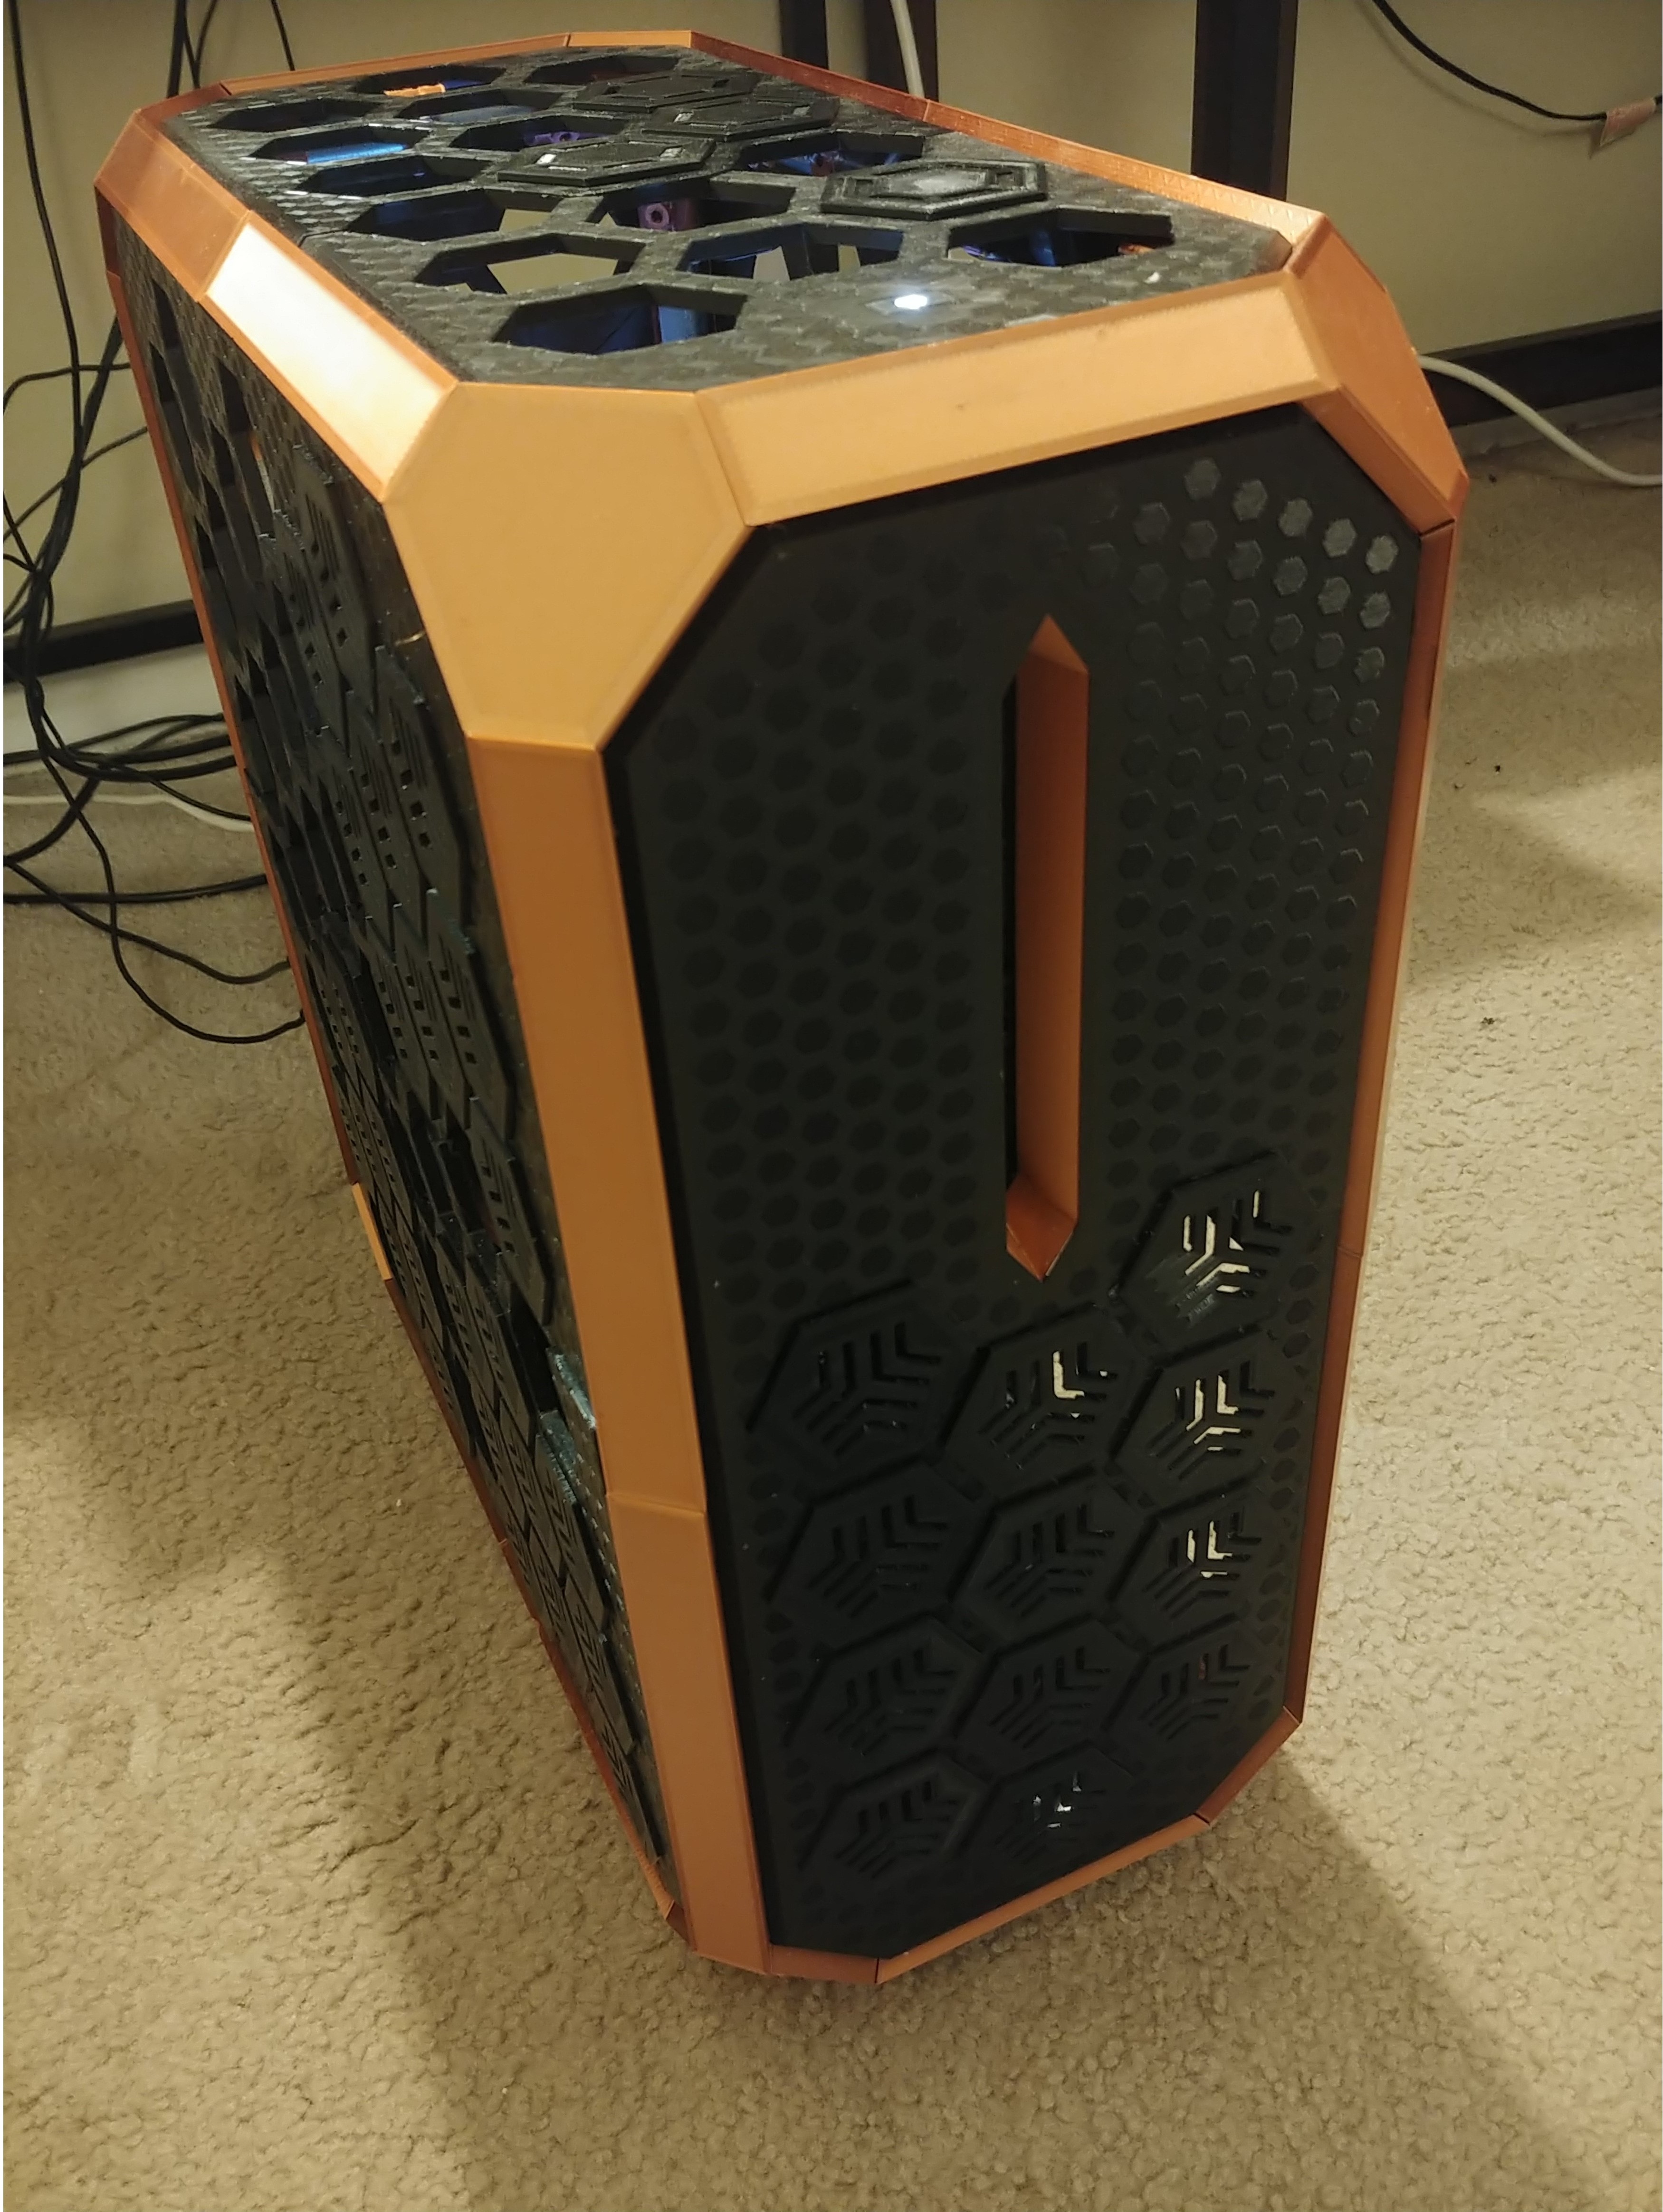
And here is the final product.
There are still a few hexagonal plugs that need to be printed, but my printer broke shortly after I finished the walls, and I think it deserves to take a well earned break... unitl the new parts to get here.